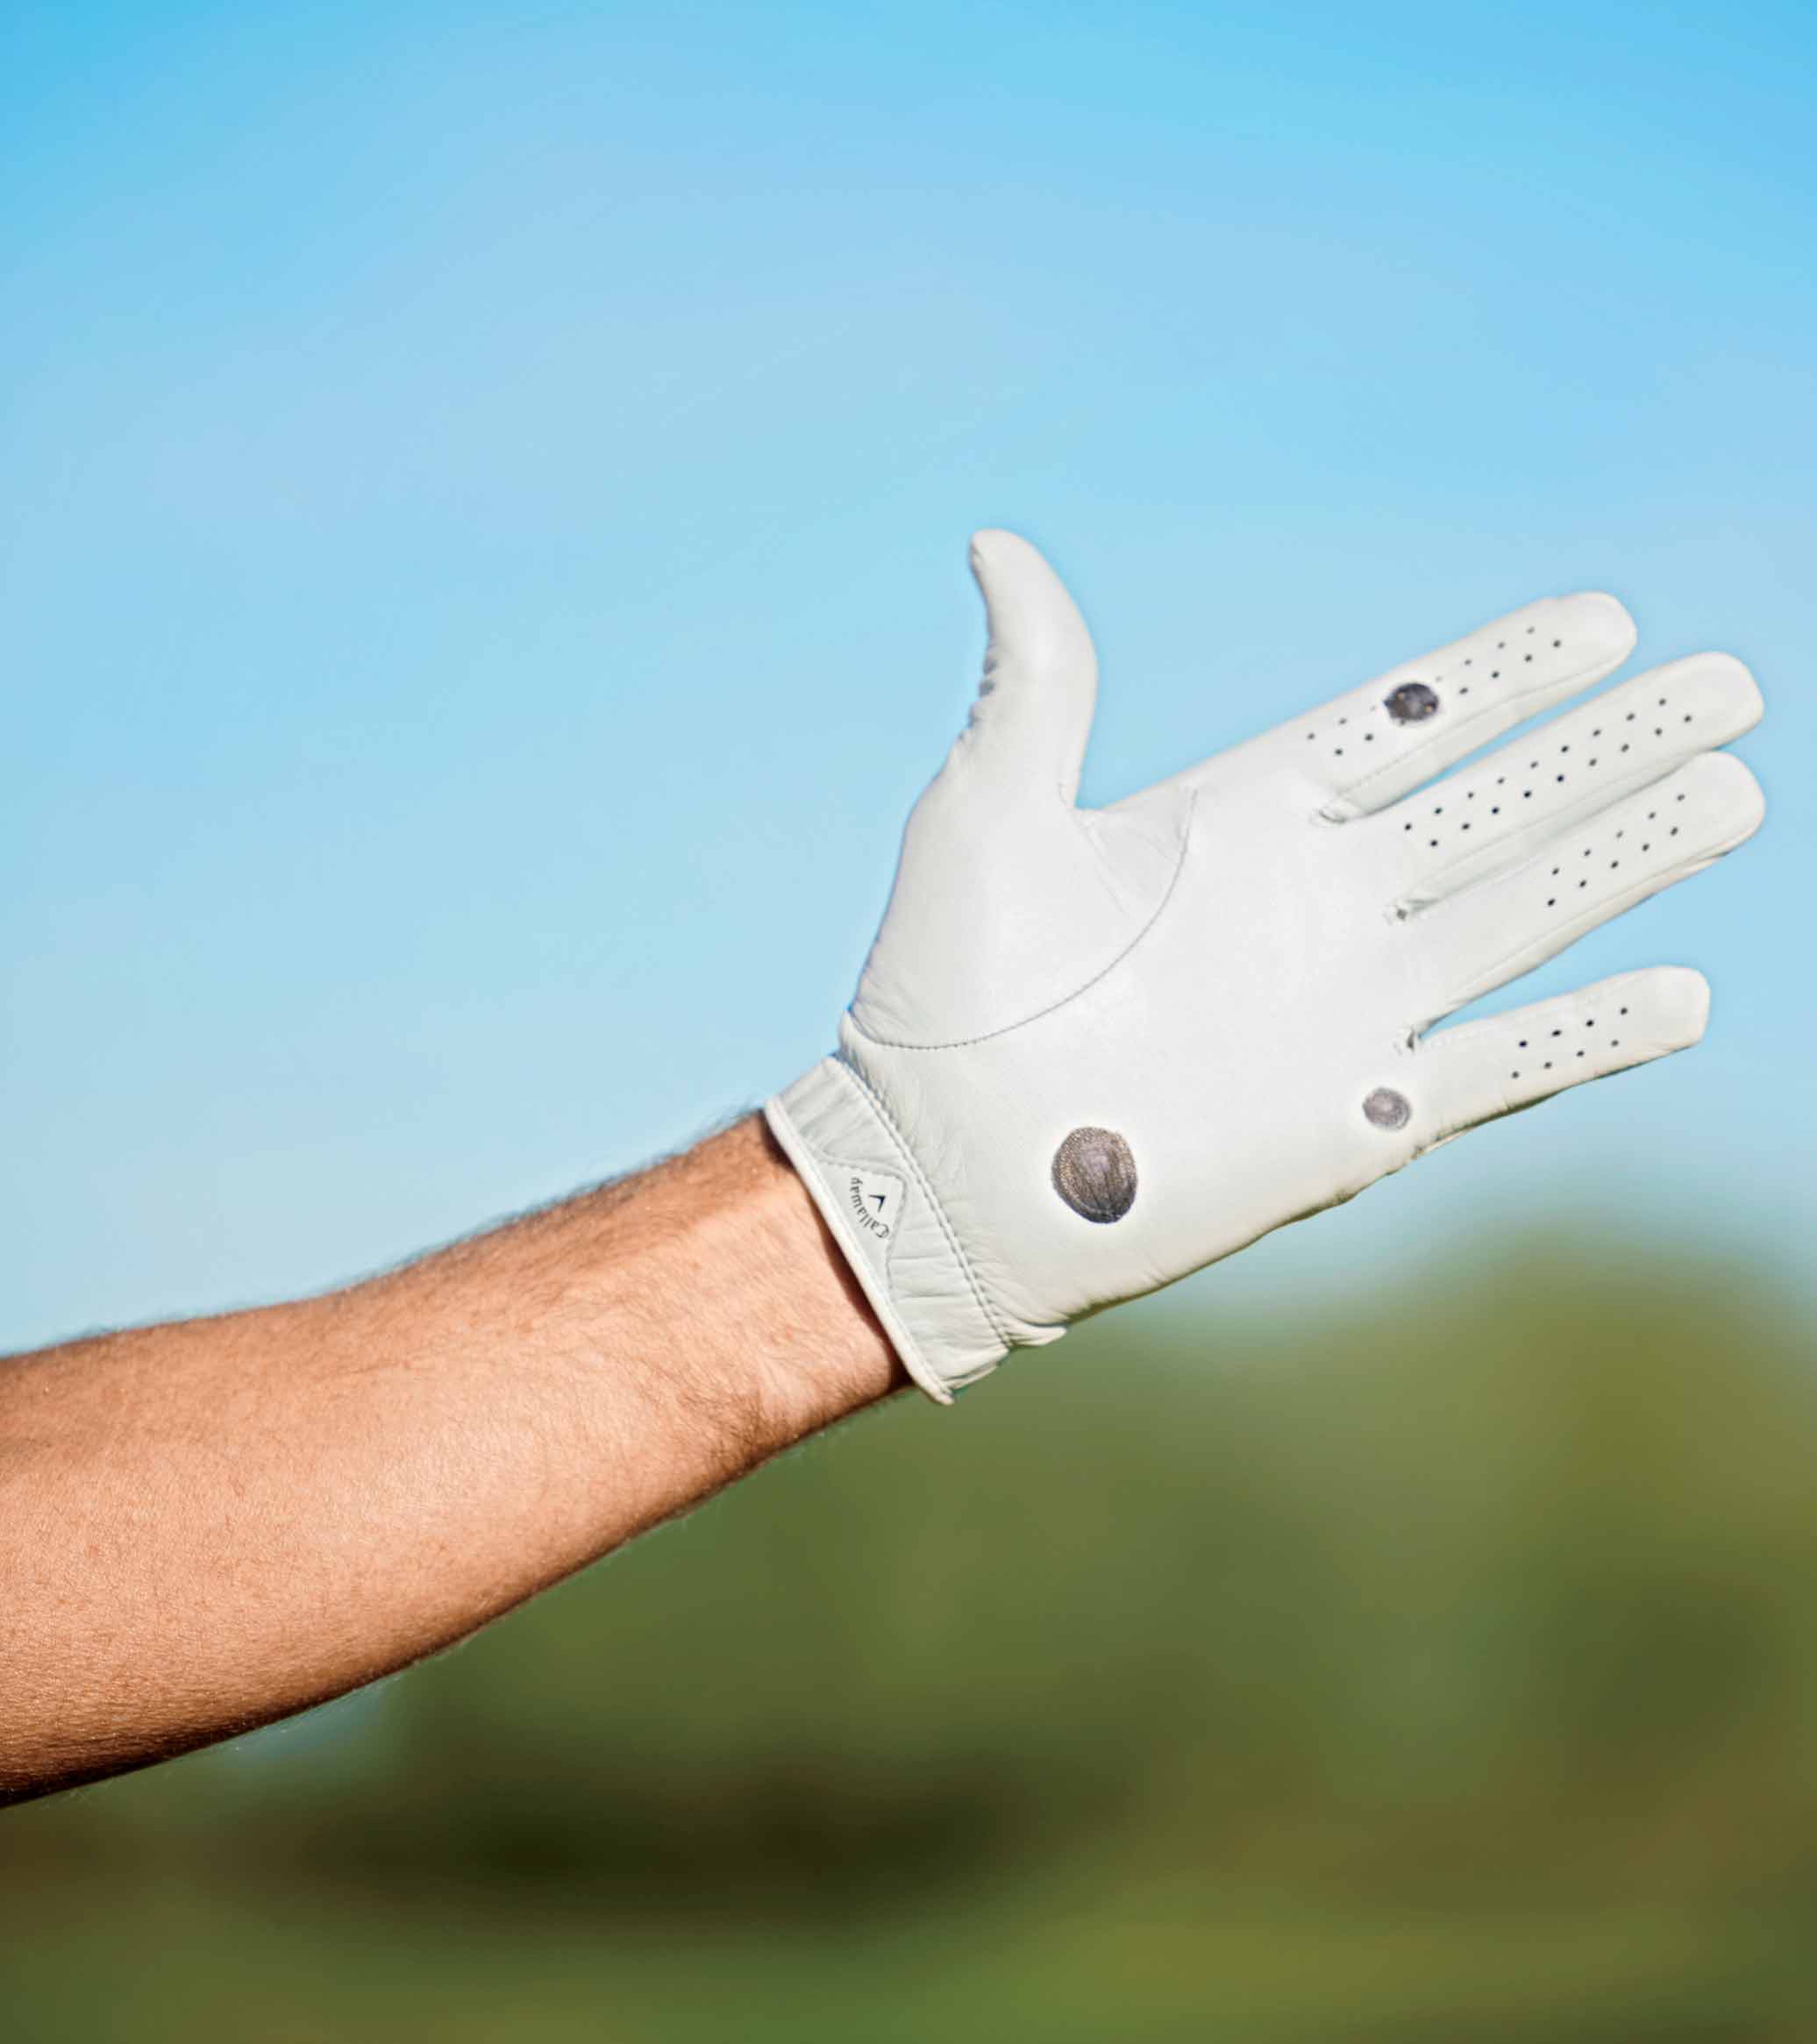
To quote Ben Hogan, “Your best golf starts with a good grip.” But how do you get one? For starters, draw three dots on your glove using a Sharpie, as shown below — one on your heel pad, one in the middle of your index finger and one at the base of your pinkie — and follow the four steps listed below.
1. Open your glove hand, so you can see all the dots.
2. Set the top of the grip just below the dot on your heel pad and just above the one on your pinkie. Crucial: Your heel pad sits above the handle.
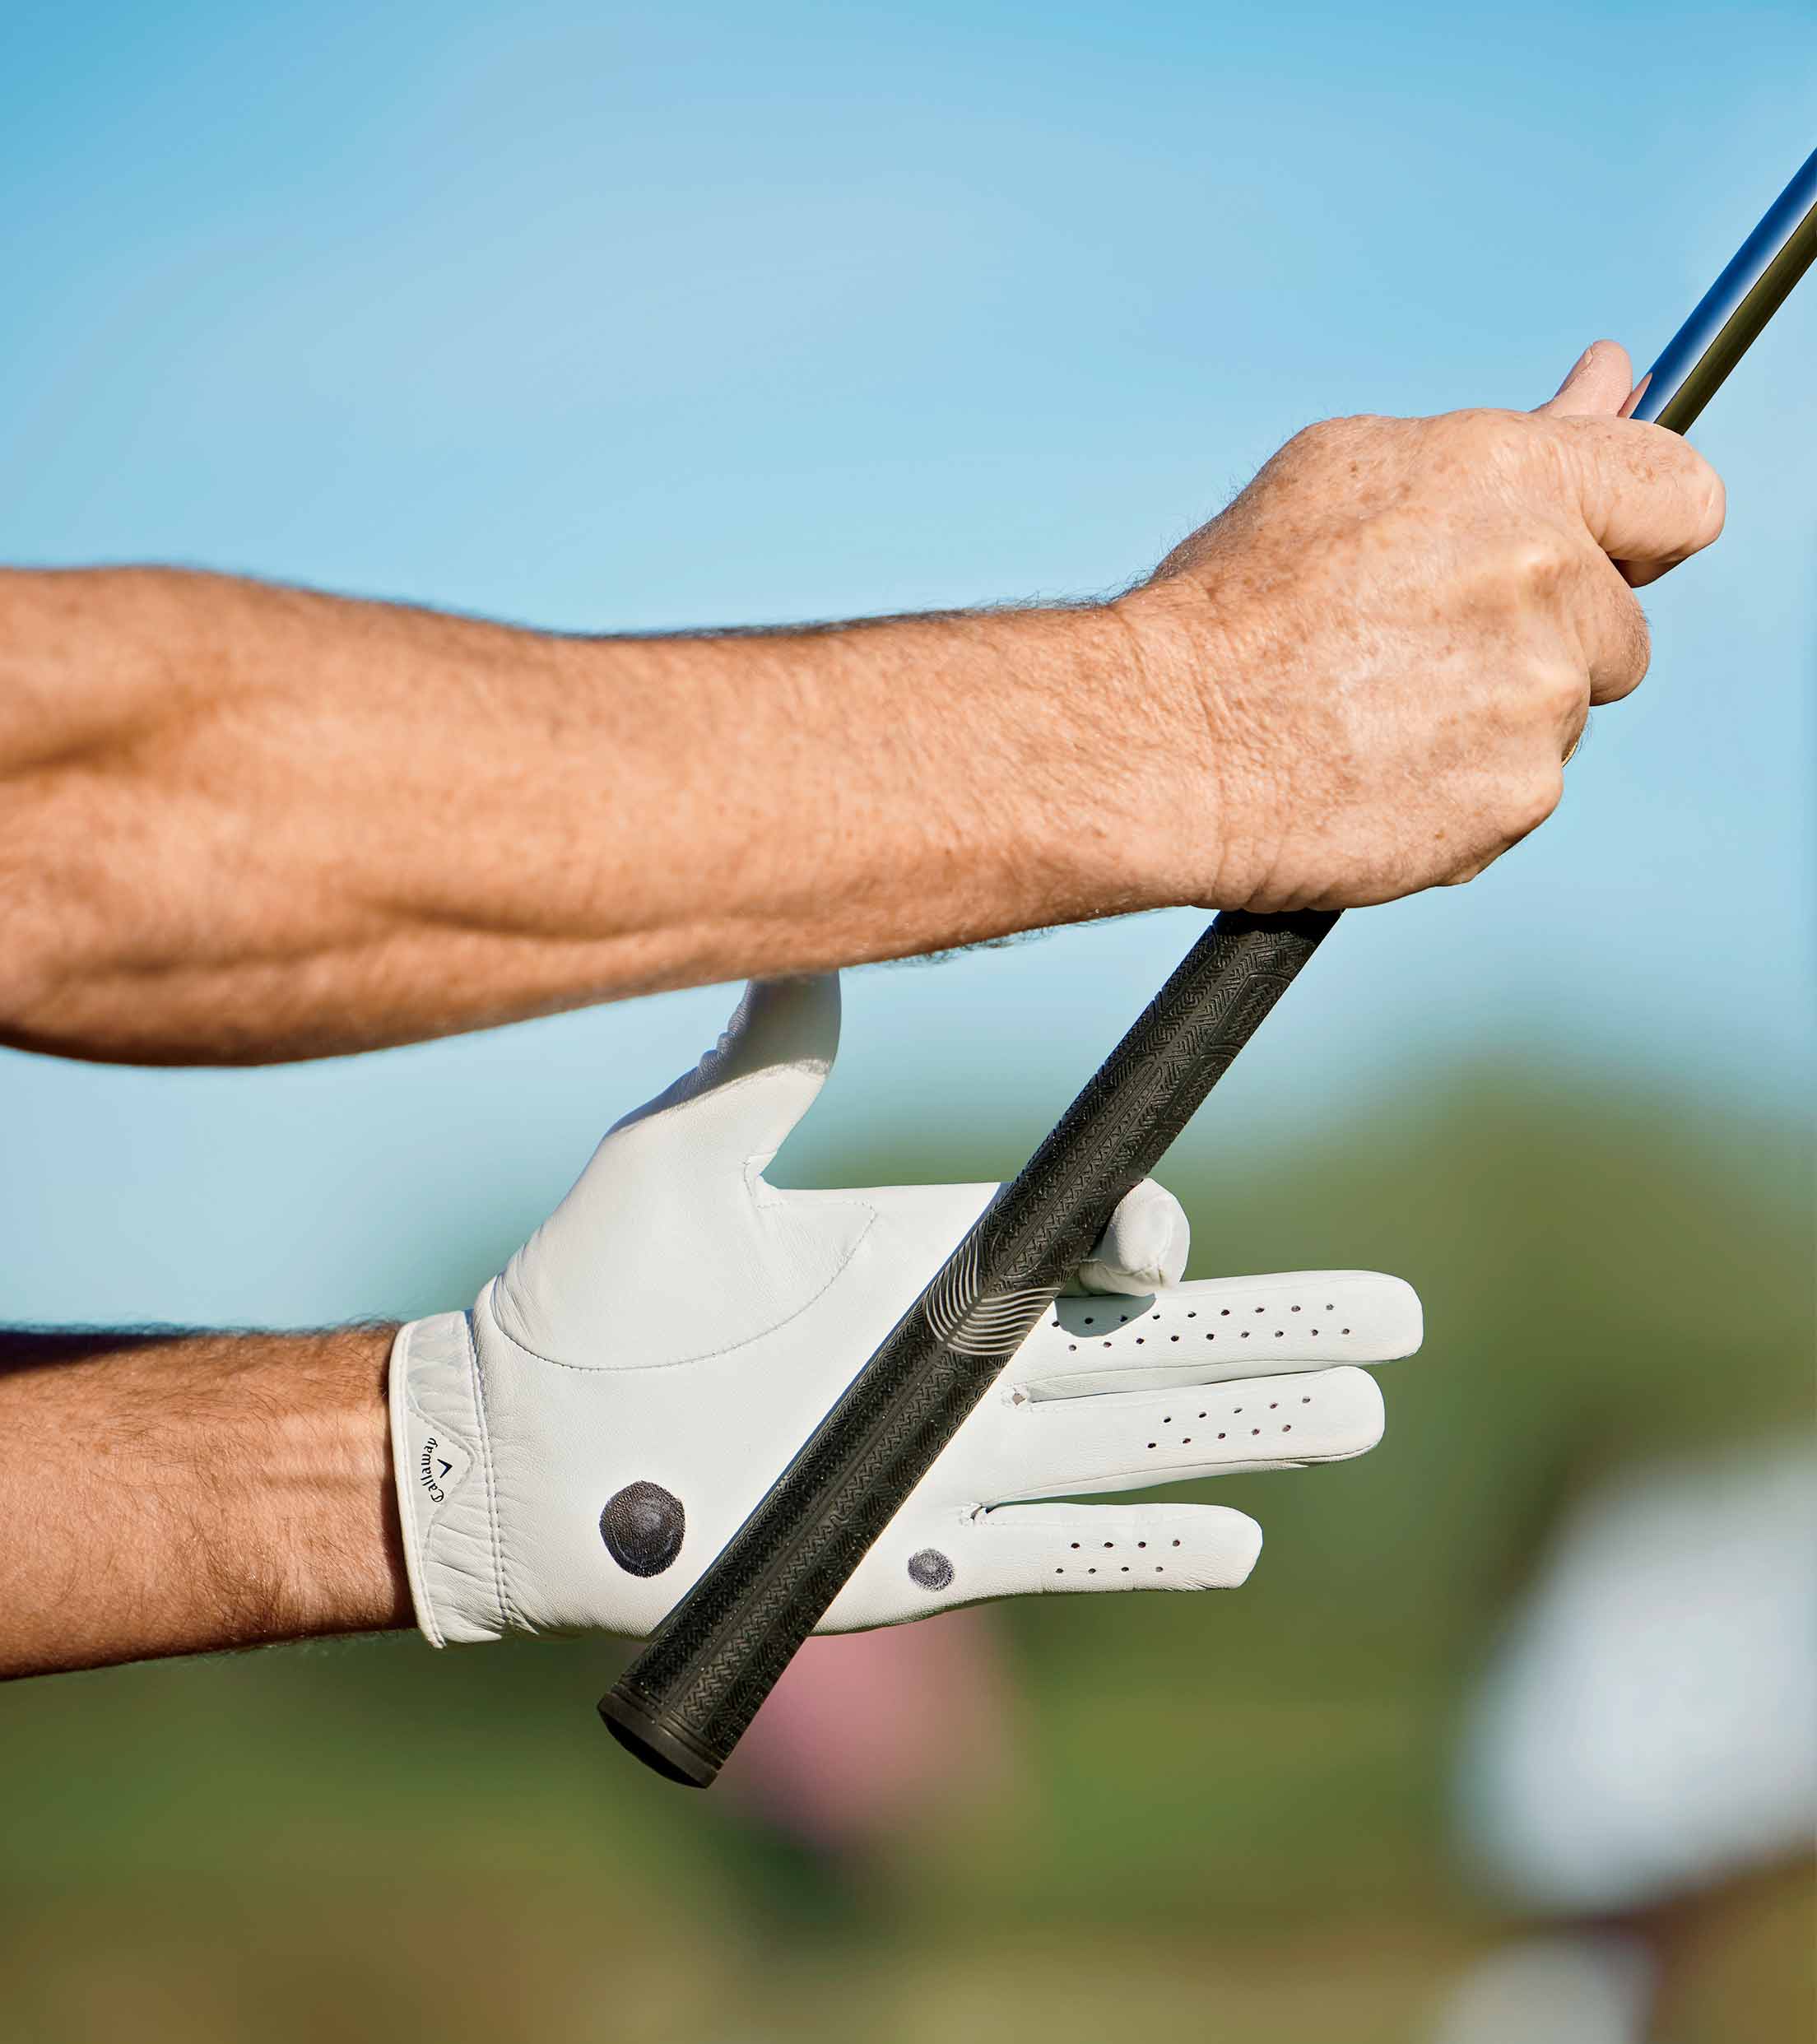
3. You’ll notice that, if you follow step 2 correctly, the grip will run through the dot on your index finger. Perfect! Wrap your index finger around the handle and close the rest of your glove hand around the handle without disturbing the grip’s position.

4. Add your trail hand to the grip and set the club in your normal address position. As a final check, look down: You should see two knuckles on your glove hand. (It’s not a bad idea to draw two extra circles here, as I’ve done in the photo.)

Connecting the dots like this in your lead hand gives you all kinds of leverage over the club. Just as it does when you’re, say, hammering a nail into a piece of wood, ample leverage frees up your wrist hinge and, most important, adds clubhead speed. Keep your dotted glove in your bag and pull it out once in a while when you practice. You’ll find it the best training aid money can buy.
Sean Hogan is a GOLF Top 100 Teacher and is the global director of golf instruction for the David Leadbetter Academies.
