Shaun Webb and Mike Granato are the coaching brains behind Athletic Motion Golf, and their mission is simple: Identify the athletic principles PGA Tour players use to help make golf more enjoyable for the rest of us. Using state-of-the-art GEARS technology, the pair reveals some common problems that rob recreational golfers of power, consistency and enjoyment.
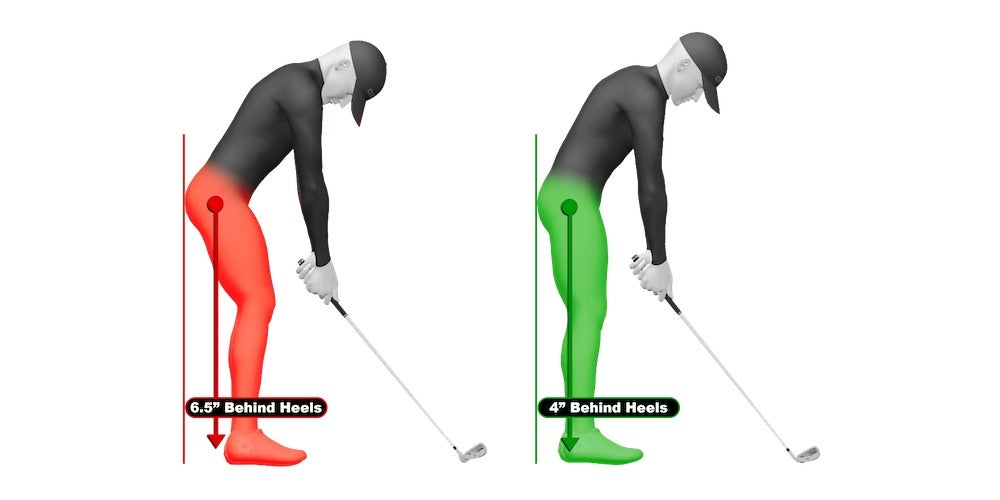
1. “Sitting” at Setup
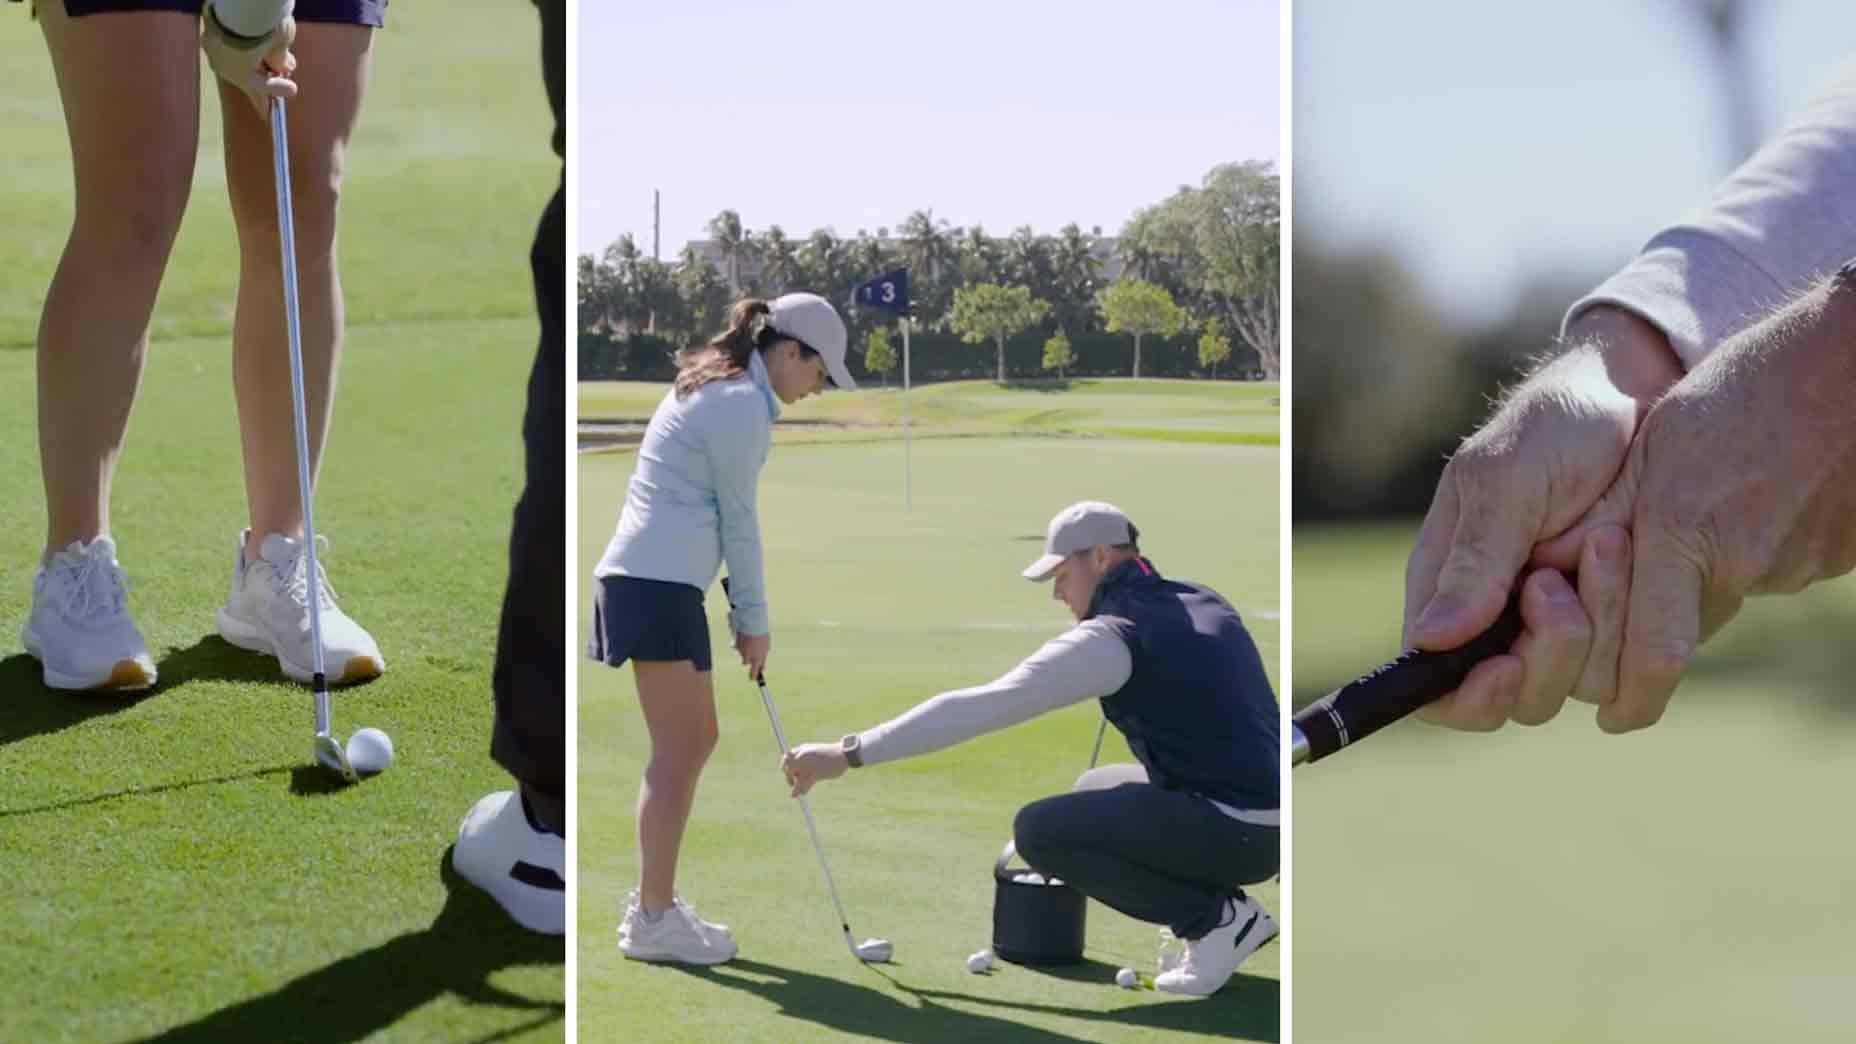
For years popular instruction has espoused adopting a posture with a “sitting-on-a-barstool” look. That posture, however, places a lot of mass behind your heels. It’s very difficult to move athletically from such a position, because the tendency is to compensate by rocking toward your toes during the backswing as you search for balance. Adopt the setup at far right. Address the ball with your hips over your ankles, which will prevent you from rocking your weight back and forth. Instead of picturing yourself sitting on a barstool, imagine that you’re looking over a picket fence. That’ll fix any balance and weight issues
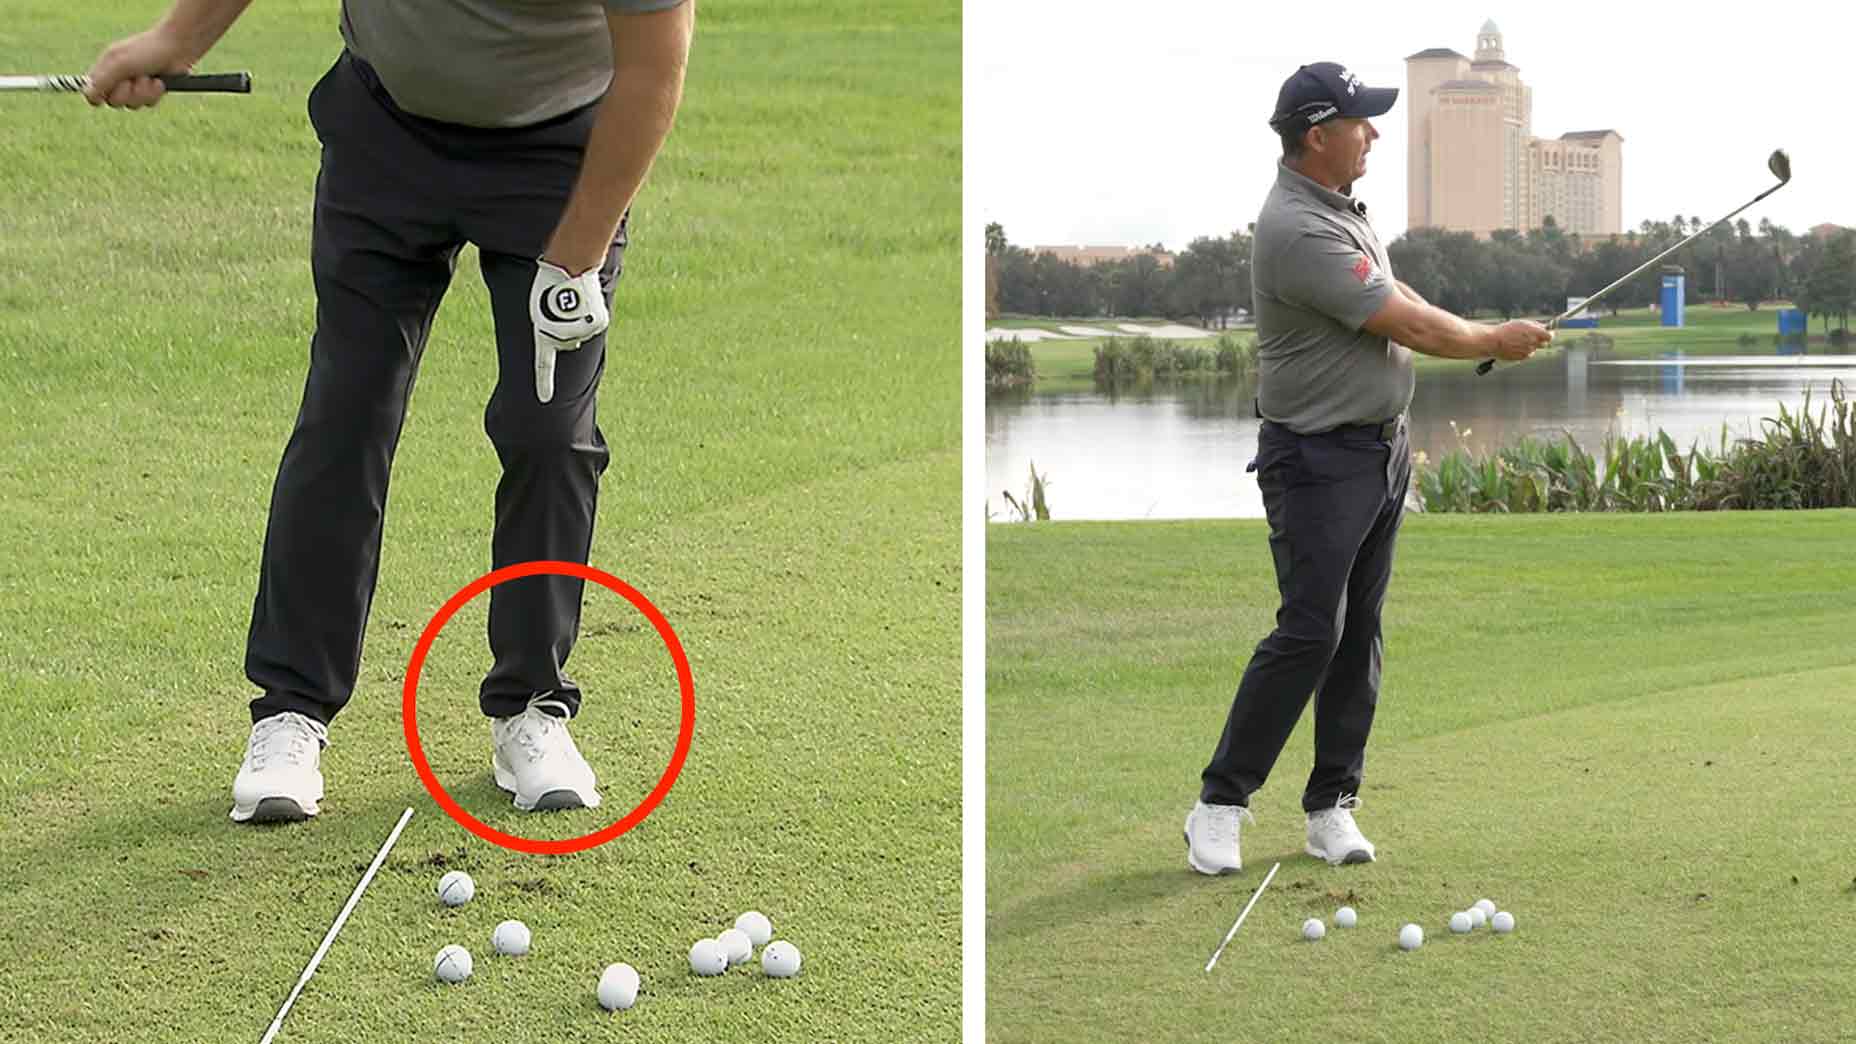
2. Swinging the Club Inside
Check the images at the bottom below; the pro (blue) has kept the shaft parallel to the target line during the takeaway. This contrasts the killer takeaway move, which is to whip the club “inside” the target line. When this happens, you’ll be late in lifting the club to the top, a precursor to coming over the top on the way down (hello, slice). To fix it, lay an alignment stick on the ground just in front of your toes.
3. Overly Shut Clubface
A seemingly logical solution for golfers who want a square face at impact is to not let the face rotate open in the takeaway.
The problem is that doesn’t work, and will almost guarantee you have a harder time squaring the face when it counts — down at impact.
Trying to keep your club face pointing at the ground or the ball will force you hands and arms to do things that will hinder you later in the backswing and make squaring the face in the downswing extremely difficult.
Instead allow the club to open a bit as you swing the club back. A good rule of thumb to look for the face to be point parallel or just slightly less than parallel to the ground at this point in the backswing. Do that, and you’ll start to develop a backswing motion that will make your downswing simpler and more consistent.
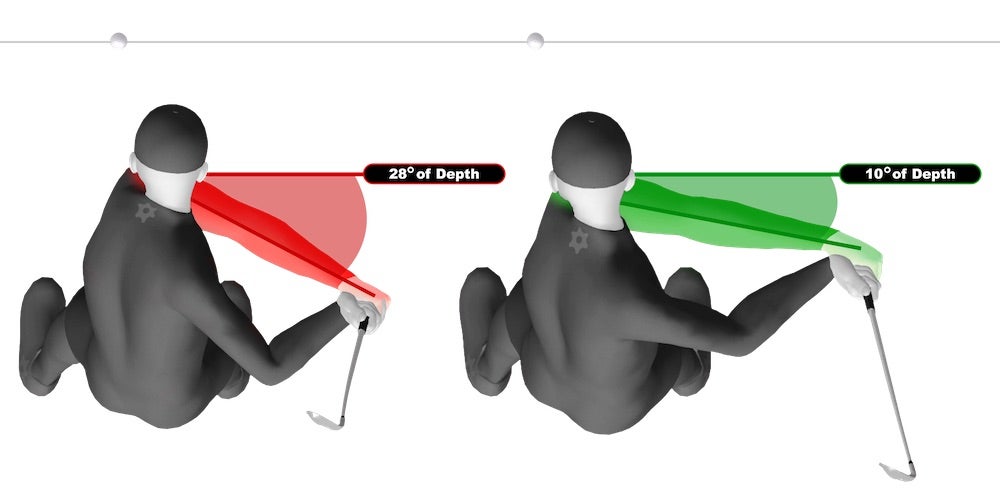
4. Fishing For Depth
Trying to pull your lead arm deep behind you early in the backswing is a trend we see cause a lot of issues.
Our two golfers here are at left arm parallel in the backswing. Notice how the amateur has more than doubled his left arm depth compared to our pro. This tends to cause a loss of width and an overly bent right arm as you reach the top.
When that happens, your rotation will suffer and you’ll be forced to make several compensations in your downswing.
Instead, try to preserve as much width as possible going back allowing your turn to take care of the depth. You’ll have a much more powerful downswing when you do it.
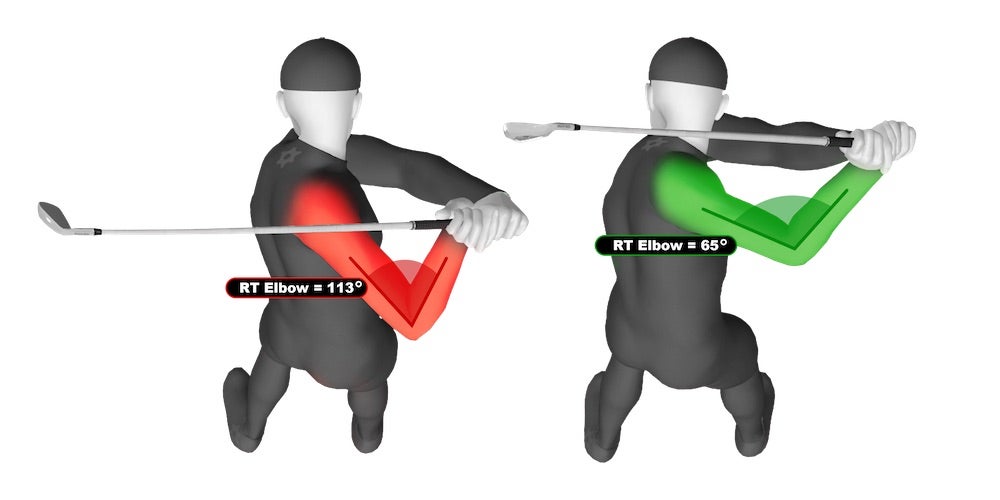
5. Collapsing Your Trail Arm
Nearly all the pros Webb and Granato studied measured between 55 and 85 degrees of right-arm bend at the top of the backswing. By comparison, most of the amateurs they’ve captured fall between 95 and 125 degrees. That’s a big power leak. Your right arm is a major acceleration source at the start of the downswing, and the straighter you keep it on the way back, the more likely you’ll increase your shoulder turn (another power source). Webb and Granato report that students who worked on keeping their trail arm straighter picked up an additional 30 degrees of shoulder rotation — even those aged 65 and older!
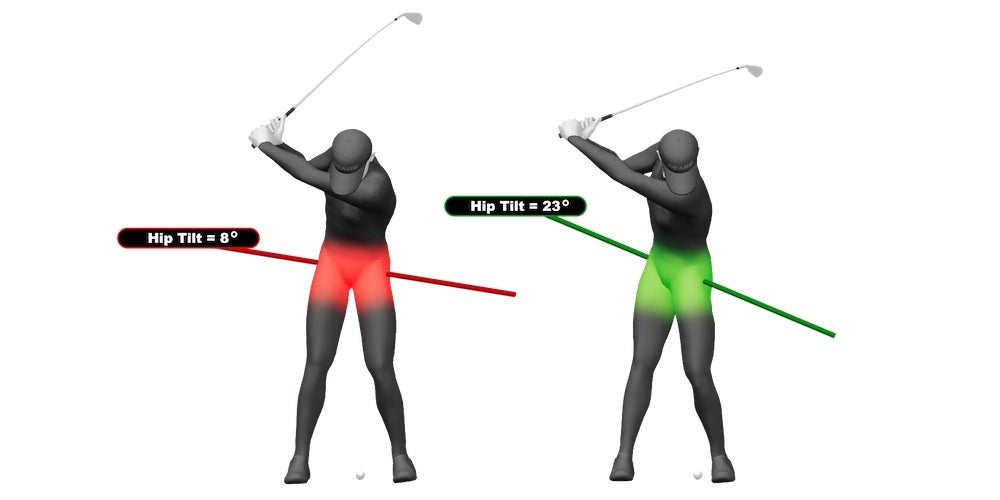
6. Making a “Level” Turn
Hitting a golf ball would be much easier if it was teed up at waist height — you’d simply turn in place and smash it. But because the ball is on the ground, you need the aforementioned turn and tilting to help you create leverage in your swing and better position your body to drive down for a powerful impact. To get the feel you’re after is at the top, check that your belt buckle is tilted, not level. That’s a powerful place from which to deliver the club to the back of the ball.
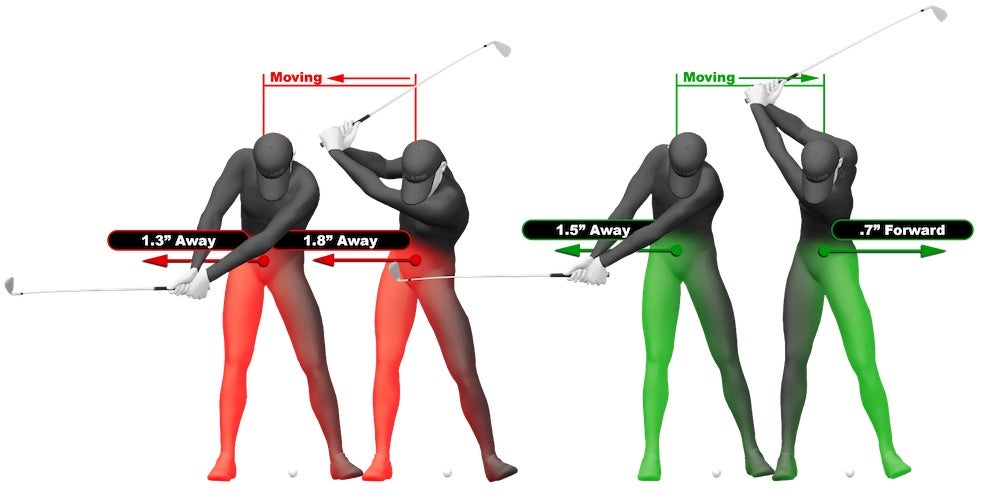
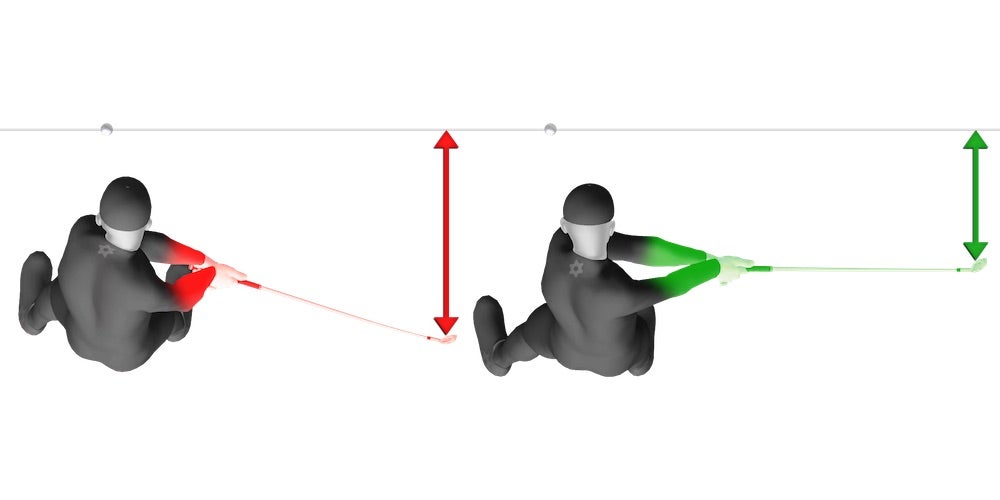
7. Late-Loading Backswing
For more distance, you’ve probably heard the advice “complete your backswing” or “load into your right side.”
Those are all true, but when you load makes the difference.
Notice how both of our golfers have shifted their lower bodies to the right when the club is parallel to the ground in their backswings. That’s both golfers “loading” into their right sides, and that’s good!
It’s what happens next that separates the pros and the amateurs.
The amateur continues to move off the ball into the top. The pro has reversed his move off the ball and has shifted himself back to just slightly forward of where he started at address. That’s how you should “completing your backswing”: by shifting towards the target slightly.
The downswing lasts just under .25 seconds. The amateur has a tremendous amount of ground to cover laterally in that tiny window of time. The pro has much less to cover allowing him to rotate better and deliver the club more consistently time after time.
So for more distance, make sure you load early, then re-center yourself by the time you reach the top of your backswing.
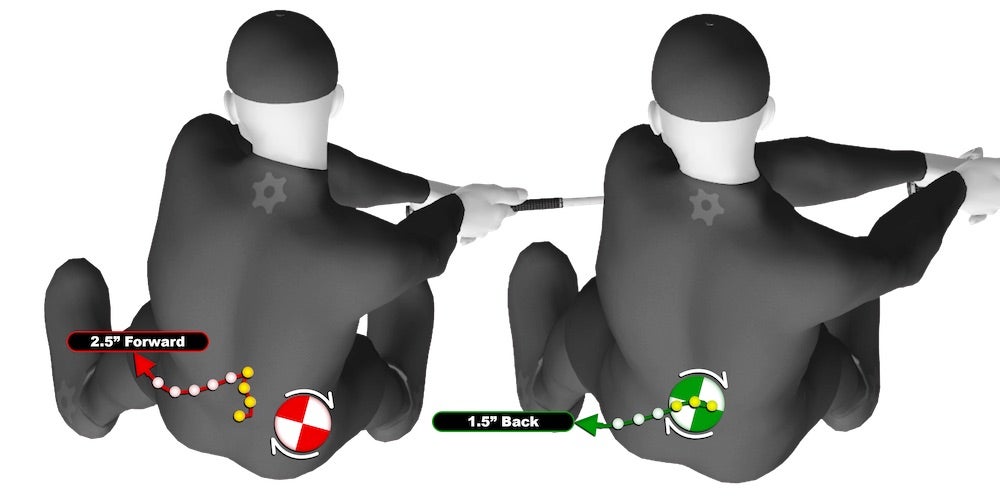
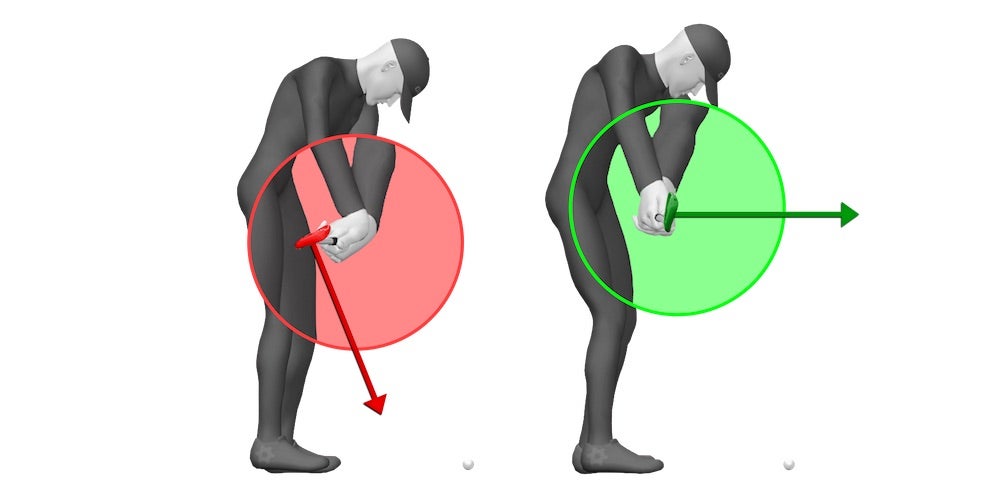
8. Thrusting Your Hips
Hip thrusting is probably the most damaging of all common swing errors. It might seem like a downswing issue, but it’s actually caused by the way you move your hips during your backswing. Webb and Granato map the position of the center of the pelvis on their students’ swings. Golfers who end up thrusting invariably rotate around their trail hip on the backswing (far left), which in turn forces them to thrust toward the ball on the way down. Copy what the pros do, which is to rotate around the pelvic center (near left). You won’t thrust — and the ball won’t know what hit it.
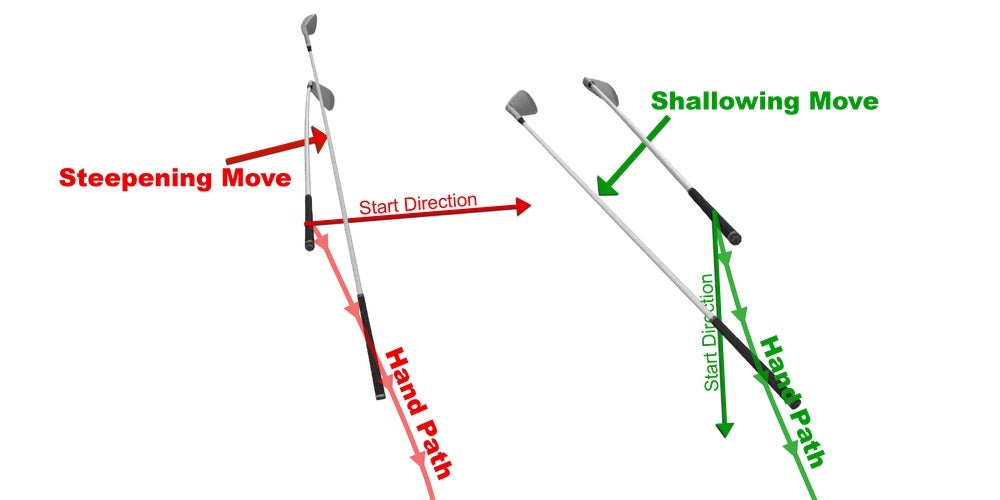
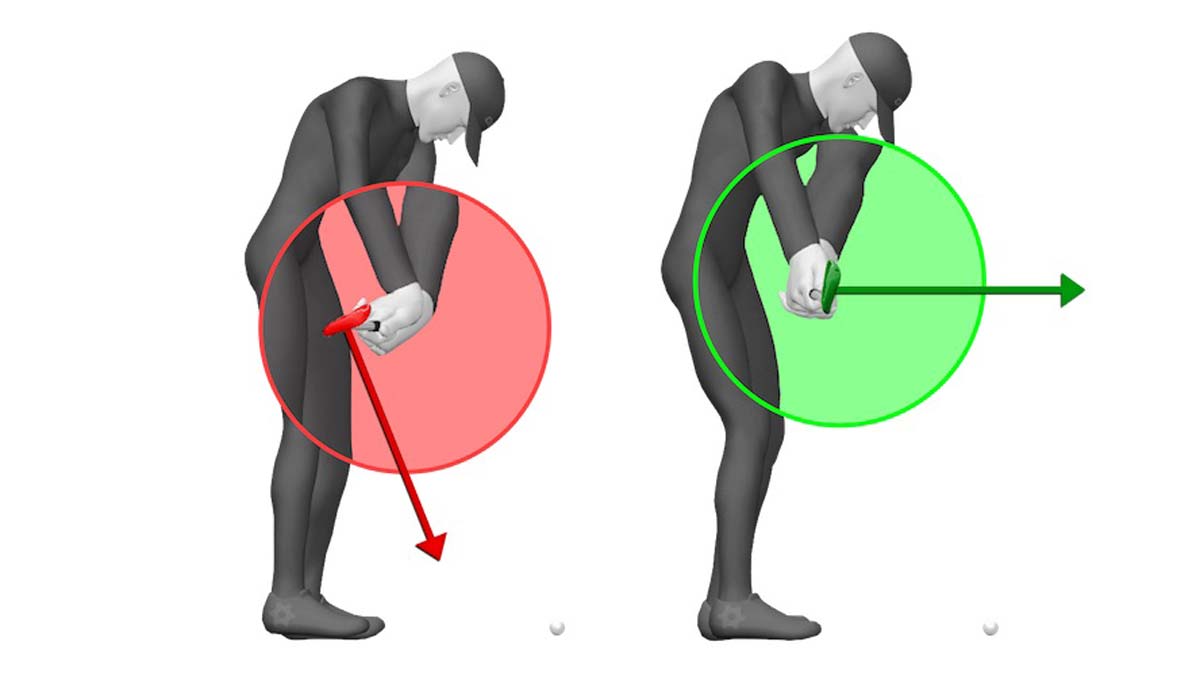
9. Passive Arms
An alarming trend we see with golfers is the idea to have passive arms at the start of their downswings. It’s a damaging idea for several reasons, but one of the biggest is that it has a negative impact on the direction the hands travel (or the hand path) from the top of the swing.
Below you’ll see the club movements here from a typical pro and amateur golfer. We’ve removed the body images to highlight the club’s movements. One club is at the top of each swing, the other is when they are at left arm parallel in the downswing.
One thing we see all the time from pros is that their hand paths start sharply downward on the downswing (see “Start Direction” arrow) and then begin to curve slightly outward as the body turn ramps up.
Compare that to the opposite movement we see so often from am golfers. Because they’re trying to be passive or leave the hands up, the start direction moves out towards the ball. This causes a hand path that starts out then curves down. That’s a big problem for rotation and club face control, and a major swing killer.
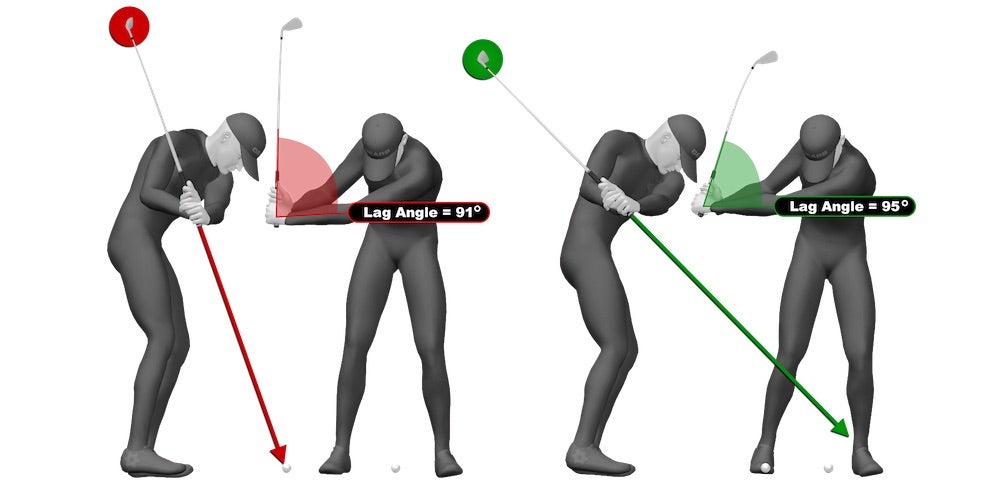
10. Chasing Lag
Lag is one of those things that every golf swing should have, but how you go about creating makes all the difference.
Think of lag as the angle between the shaft and your left arm. The smaller the angle, the more lag you have. But as you can see from our two golfers, not all lag is the same.
The am above actually has more lag than the most famous modern-day lagger in golf — but it doesn’t look like it.
To create more lag, our amateur golfer had to cup his left wrist. The pro is doing the opposite. Which creates less lag angle but more of the look of lag because he is now able to shallow the shaft. A shallow shaft will always LOOK like it has more lag than a steep/vertical shaft.
Also note that by flattening his left wrist (rather than cupping it), the pro has begun squaring his face very early in the downswing. A must for delivering all the benefits associated with lag.