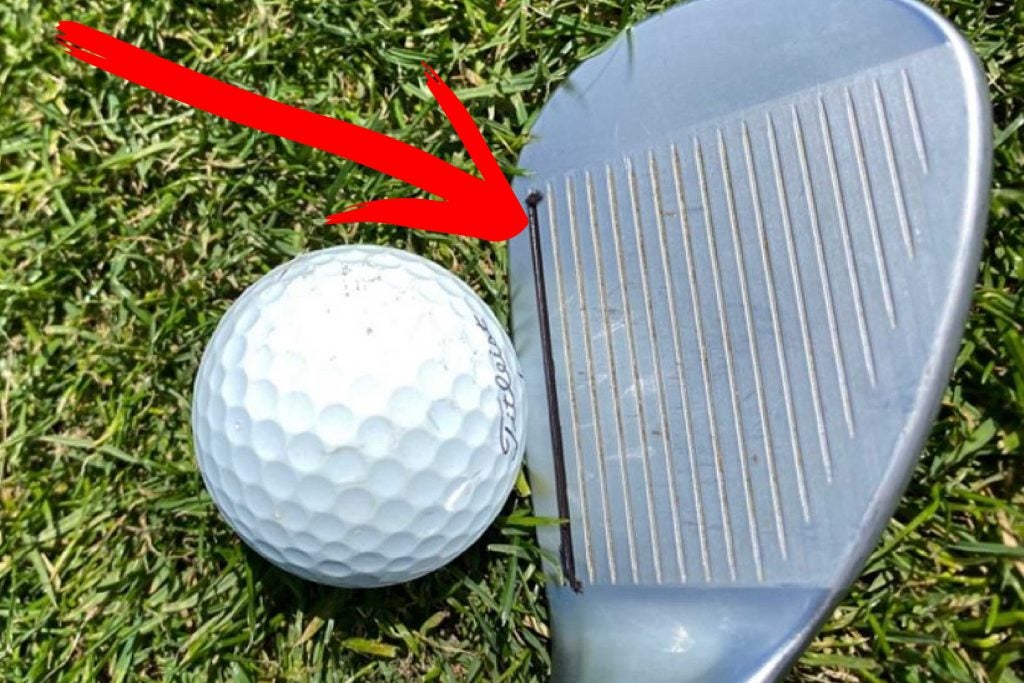
Blading chip shots over the green can be a real scorecard-wrecker — not to mention a confidence killer. So let’s head over to the short game area — do you remember the last time you were there? — for a quick and easy practice session that’ll improve the quality of your chip shots.
And all you need is a sharpie and your wedge. A sharpie will be a little harder to get off your wedge, so if you’re worried about that, you can use a dry erase marker instead.
Here’s how it works
1. Fill-in the bottom groove
Take your wedge in your hand like I’m doing here, and color in the bottom groove of the wedge (or wedges) that you use the most around the green. Don’t worry, doing this won’t negatively affect the performance of your wedge.
2. Place it under your ball
Once you’ve done that, place a golf ball on the ground so the logo is parallel to the ground, and then slide the colored-in groove so it’s sitting beneath it. That’s where you’ll want to make contact with the golf ball.
Simple! That’s your swing thought the next time you’re chipping around the greens: Slide the bottom groove under the middle of the golf ball. And before you ask, yes, it’s legal to mark-up your wedge like this and play the golf course — as long as you do it before your round, and not during it.
Practice this on the chipping green between your rounds, and you’ll be hitting crispier chips on the course in no time.
