If you play golf, you have golf grips. And those grips have a logo on them. You probably think that logo is there for the same reason most logos are on stuff — branding — which isn’t entirely wrong. But it’s also there to help you with your golf grip basics.
Here’s how.
The golf grip I’m using to demonstrate below are the ones I have on my clubs: The Golf Pride MCC Align. It’s a hybrid cord grip with a rib at the back, which I use along with the logo to make sure I keep my grip in good shape.
You can buy a set for yourselves right here:
And once you stick them on your clubs, you’ll be able to use them to actually improve your golf grip, a basic fundamental of the game.
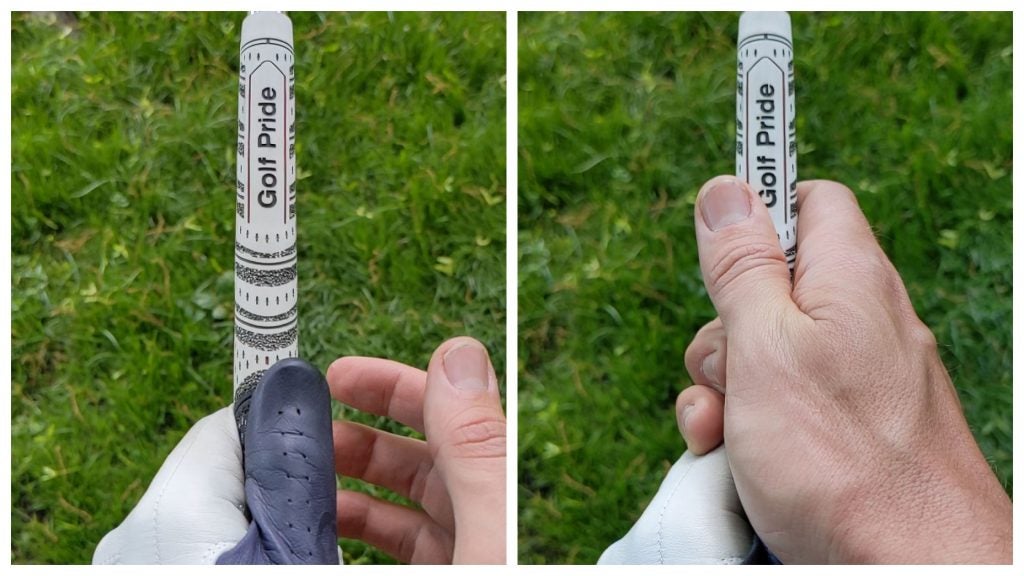
First, hold the club out in front of you, like this. When you look down at the grip, you’ll see the Golf Pride logo at the bottom of the grip and the “align” at the top. They each align with a square clubface, and you’ll want to make sure your open hand slides directly underneath them, so you’re gripping the club in the fingers and not the palm.
And once you have your hand situated like this, with your fingers underneath the two logos, fold your hand over onto the grip. You want the thumb of your lead hand (left hand for right-handed golfers) to be ever-so-slightly to the right of the two logos when you look down. When you lift it up like you see me doing below, you’ll see two knuckles on your lead hand.
Once you have the club in your hand and lift it up like you see me doing above, place your trail hand (right hand for right-handers) so the gap between your thumb is on the left side of the logo as you see it when you look down.
Hey, presto! You’ve got yourself a neutral golf grip. That’s why the logos on golf grips can come in so handy.
And just to be clear: A neutral grip isn’t the same thing as a perfect grip. Pros have all different kinds of grips based on their body type and preference.
But, generally speaking, a neutral grip is the kind most coaches teach to new golfers. Use the logos on your grip to get a neutral starting point, and adjust from there.
