
A quick way to make your clubs stand out, show love for your favorite sports teams or even just change how they look is to dress them up with some custom paint fill. Sure, it’s likely your local clubfitter could do it too, but the process isn’t that hard if you want to do it yourself.
But before we go further, it’s important to know we’re not talking about total paint jobs and we’re definitely not advising you to paint your driver, metal woods or hybrids — rather custom paint fill refers to re-coloring the embossed elements of your clubs such as logos, names and numbers on your irons, wedges and putter. If you’re looking to get a total club makeover, we suggest seeking out a pro for that kind of work. Here’s how you do it.
Items you need:

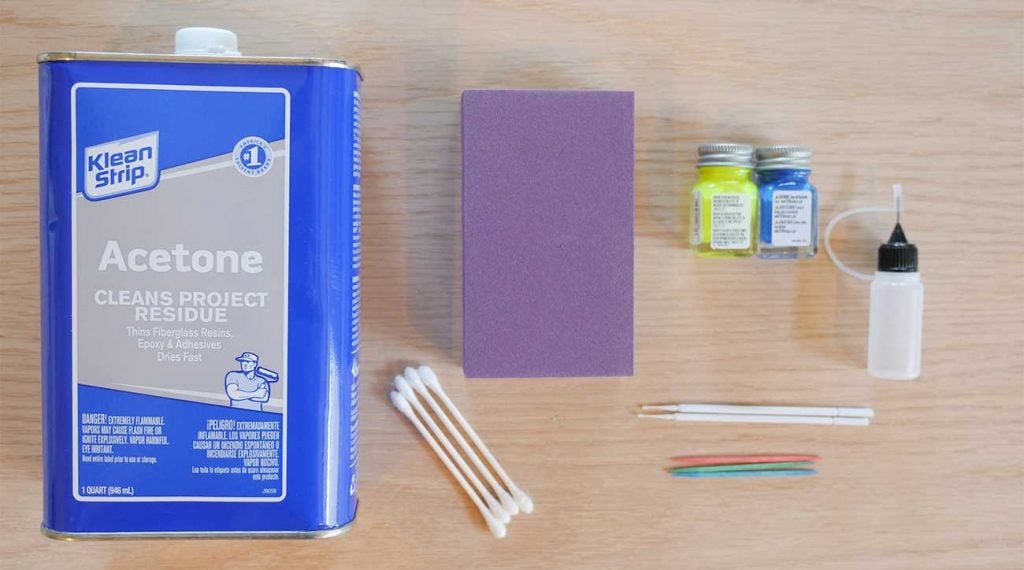
First, you need to ensure you use the right kind of paint. We’ve seen/heard people use all sorts of paints and fills ranging from nail polish to permanent markers and paint pens, but we’ve had the most success using hobby/model paint. Typically, enamel hobby paint is more durable, but we’ve found acrylic hobby paint to be easier to use and easier to dilute (which is important).
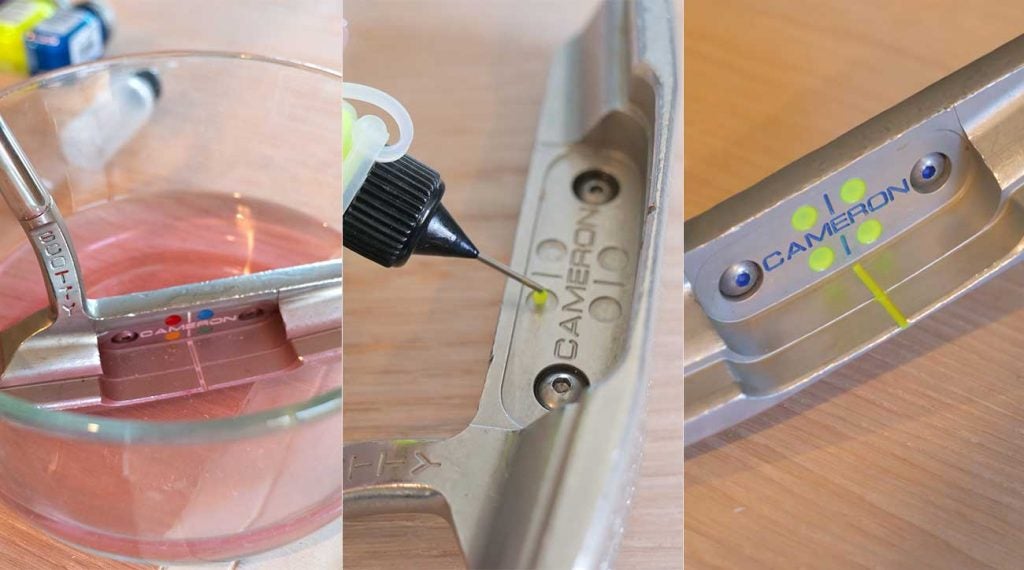
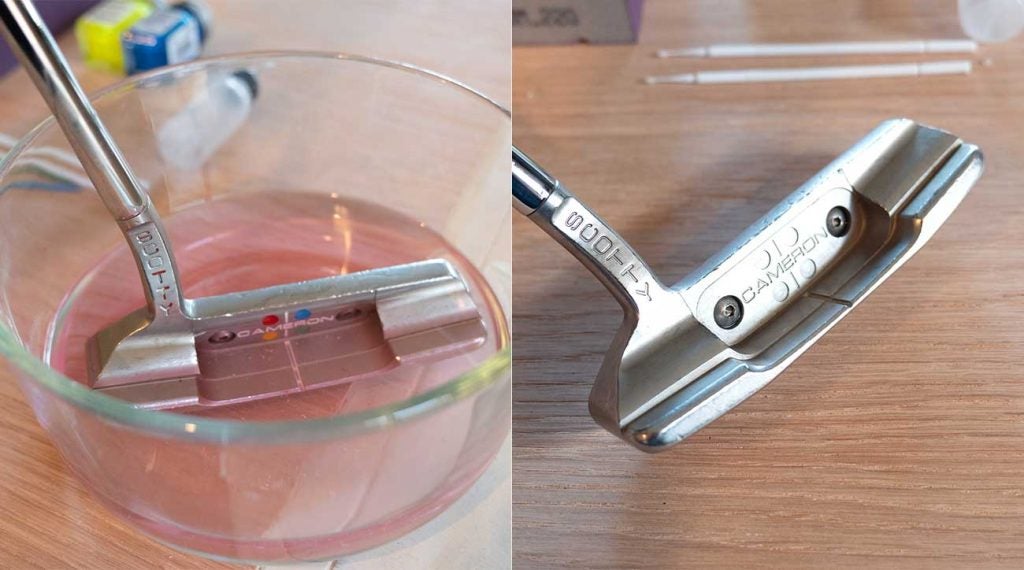
Next, your clubs need to be clean and existing paint needs to be removed. Acetone works well, and we strongly advise to wear gloves and eye protection, and do this step in a well-ventilated area. You can either soak your clubhead or lay a few dabs of acetone with a swab or rag over the areas where you want paint removed. Toothpicks and needles can help you scrape out hard-to-reach nooks and crannies. If acetone isn’t working well enough, an industrial paint remover is your next option, but be careful. It’s very toxic. When you are finished clean your clubhead with water and ensure all paint debris and acetone are completely gone. Make sure the clubhead is totally dry before getting ready to paint.
ADVERTISEMENT
Now we start painting. I recommend using a needle-tip applicator to fill in your paints, but if that’s not available use a small brush or even a toothpick. The key here is to ensure even, full-paint fills, so if your paint is coming on thick and not filling in the letters or numbers you’re trying to fill, adding acetone can thin it out. It’s also fine if you overfill a little when painting.
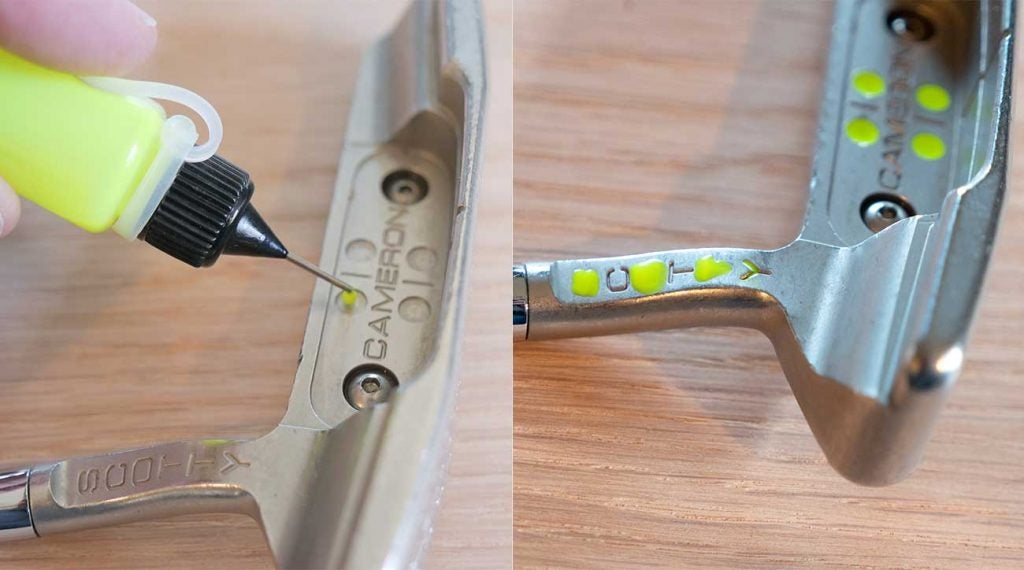
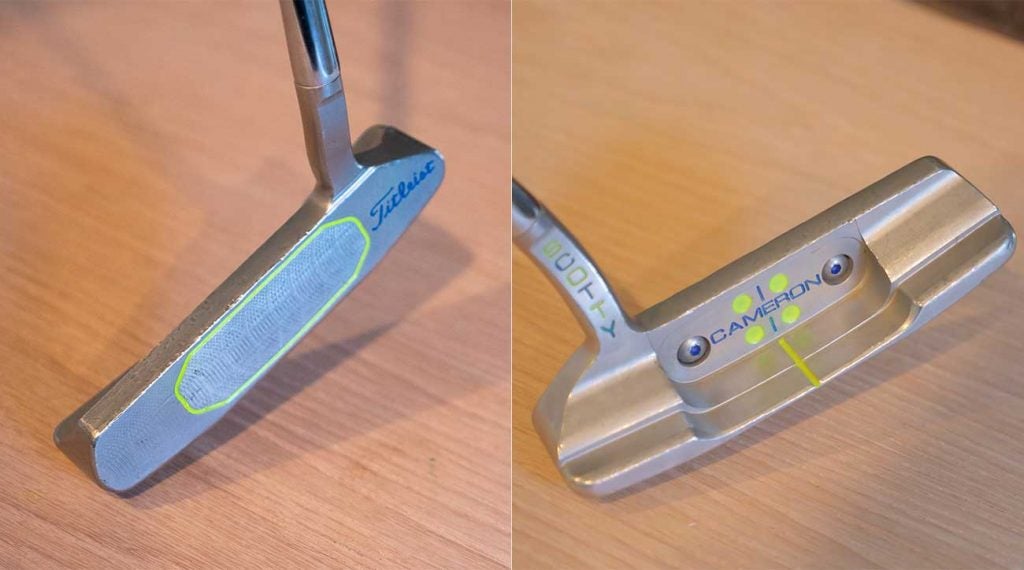
Once dry you can use an acetone-soaked cotton swab to remove excess paint that spilled over the edges. Sometimes you might have to do two or three coats to ensure a good even fill. You can also grab a fine-grit sanding block to buff out small dings and scratches, but I actually like the way this Scotty Cameron looks with its imperfections as they are.
Then, voila, in a short time with no more than $12 in supplies, you’ll have custom clubs decked out with any color(s) you want.
ADVERTISEMENT